How to Mark a Document as Final
With Word 2016 you can now mark a document as ‘final’ this means users will receive a read-only copy of the document.
Follow these simple steps:
- Click on the File Ribbon tab, this will take you into the File area to manage your document
- Within the Info option, you’ll see Protect Document click on the icon and a dropdown menu will appear, from this menu click on Mark as Final.
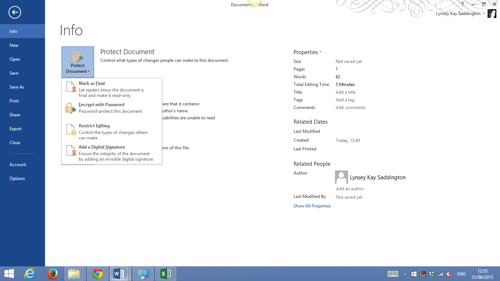
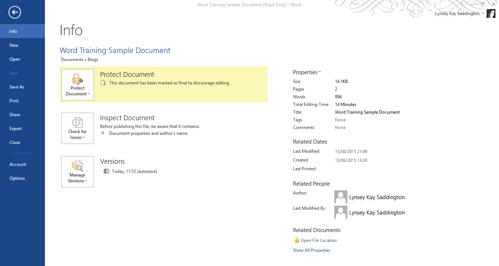
A pop up message box will appear, click on the OK button

- This will then display the following message box:

- Click on the OK button, the document is now marked as final
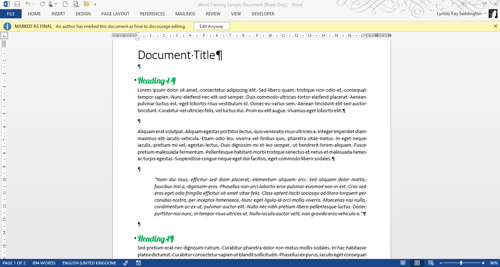
- The formatting tools are turned off and you can see in the status bar that is final by the small stamp icon. Users will still have the option to override the editing if they wanted.
Restricting Editing
Another way to restrict editing is to select certain areas that cannot be changed and then adding a password, this password is then required if the document needs to be edited.

- Click on the File Ribbon tab, this will take you into the File area to manage your document
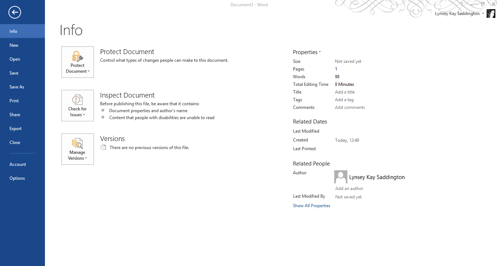
- Within the Info option you’ll see Protect Document click on the icon and a dropdown menu will appear, from this menu click on Restrict Editing
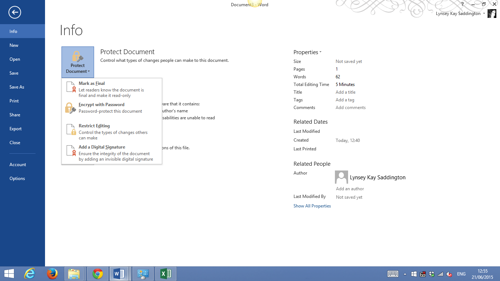
- This will take you back into your document, with a new panel down the right hand side
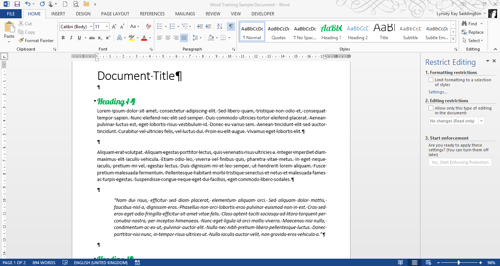
- From the Panel on the right hand side, click in the ‘Allow only this type of editing in the document:’ checkbox
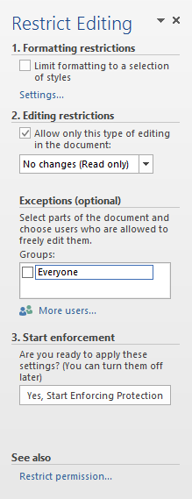
- Leave the dropdown list as ‘No changes (read only)’
- In Section 3 click on the ‘Yes, Start Enforcing Protection’ button, this will open the Start Enforcing Protection pop-up window
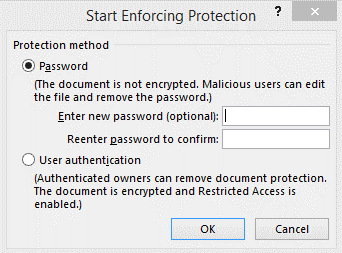
- Leave the Password radio button selected click in the ‘Enter new password (optional):’ field and enter a password
- Click in the ‘Re-enter password to confirm:’ field and enter the password again
- Click on the OK button, the right hand panel will now change and you will notice that the Ribbons are now greyed out not allowing you to edit the document
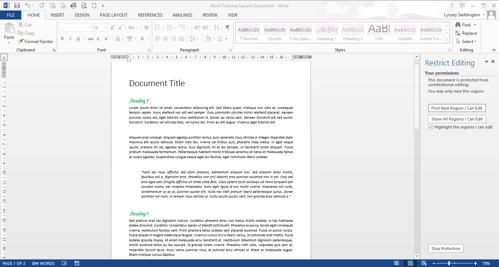
- Make sure you save the changes
You must remember the password you set, else you won’t be able to edit the document again when the time comes!
Unprotecting a Document
To return the document to editing mode, all you need to do is:
- From the panel on the right hand side, click on the Stop Protection button, this will open a pop-up window
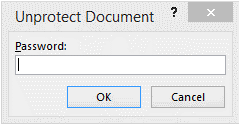
- Click in the Password field and enter the password you set
- Click on the OK button, you can now edit your document again
Find other useful hints and tips on Microsoft word in our knowledge hub!


